The aim is that all the recordings on Lingopolo are more or less the same volume. This ensures that the overall volume from one recording to another stays consistent. We don't want users to have to turn up the volume because they can't hear a recording very well compared to the others, nor do we want them to be made to jump by an unusally loud recording. This page describes how to make it so that a recording has the standard volume.
1. Make sure that you begin with a loud enough recording
If the recording is too quiet, it is better that you rerecord it to ensure that the quality is as high as possible. How quiet is too quiet? The vertical scale displays amplitude with 1.0 being the maximum value of positive signals and -1.0 the maximum of negative signals. The recording should have a minimum of 0.5 amplitude, and the ideal is that the maximum amplitude is just below 1.0, so that it needs amplifying hardly at all. It is possible to amplify any recording, no matter how quiet, but the amount of distortion increases the more that it needs to be amplified, and so for high quality recordings, they should always start off as between 0.5 and 1.0, preferably nearer 1.0 than 0.5.
Note that if the amplitude is frequently already at 1.0, then this is too loud, since we are then chopping off the top of the waveform, which is distortion; in that case it is also best to rerecord.
2. Make sure you have removed the background noise first
Before you change the recording to have a standard volume, it is important that you have used Audacity to remove background noise, since you will likely be amplifying the recording, so you will also be amplifying the noise. Therefore, if you have not already done the background noise removal process, please go back to the background noise removal page and follow the instructions there.
3. Select just the part of the recording for which you wish to amplify to standard volume
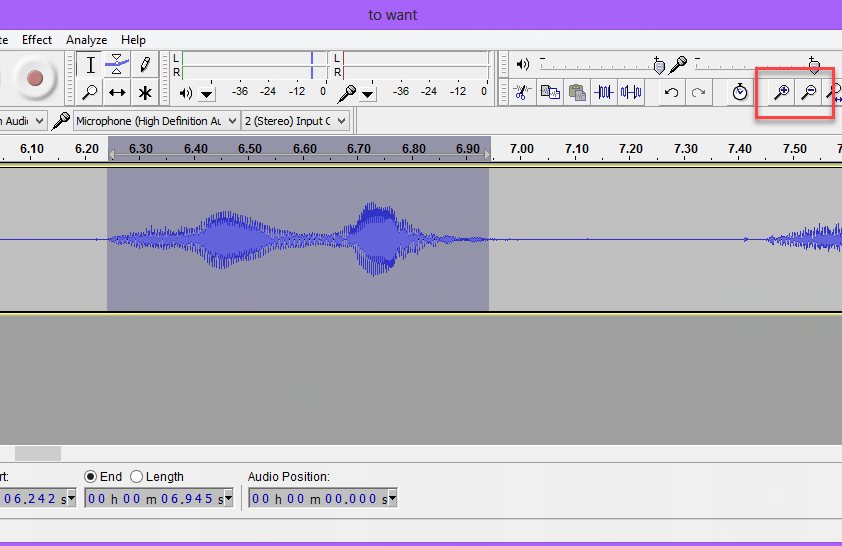
a) Use the magnifying glass icons with "+" and "-" to be able to zoom in or out to see clearly just the bit of the recording which is wanted
b) Use the mouse to select just the part of the recording which is wanted to amplify
4. Amplify the clip
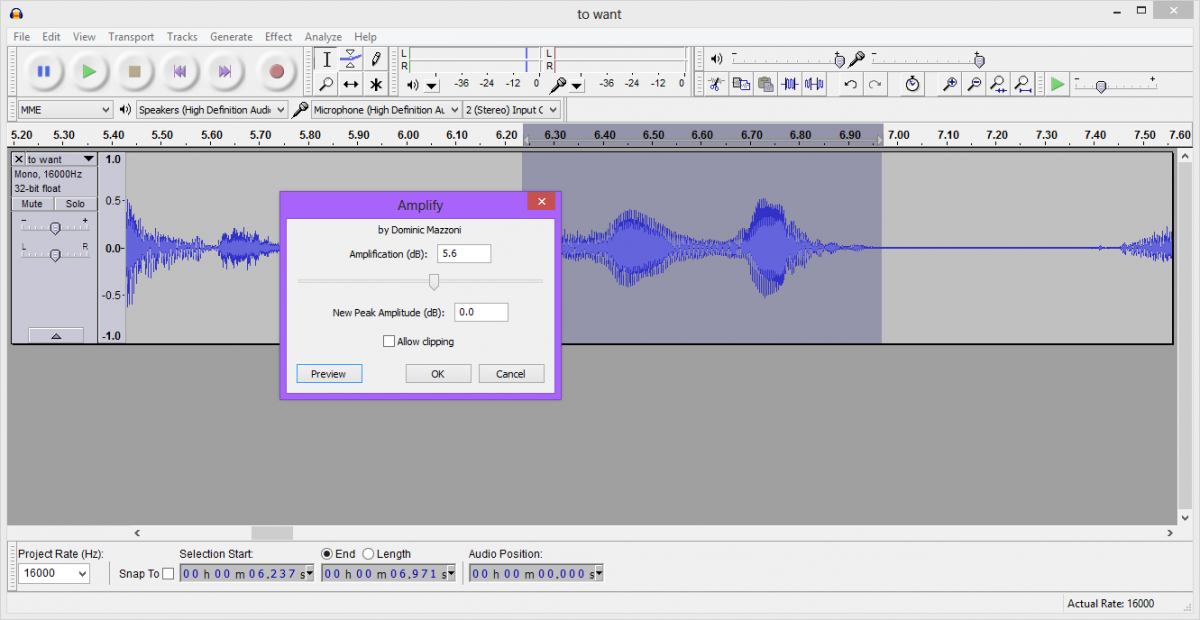
From the Audacity menu select "Effect" -> "Amplify...".
The "Amplify" dialogue box will appear with the amount of amplification required to amplify (to +1 / -1) already filled in. You can just click on OK to complete the amplification.
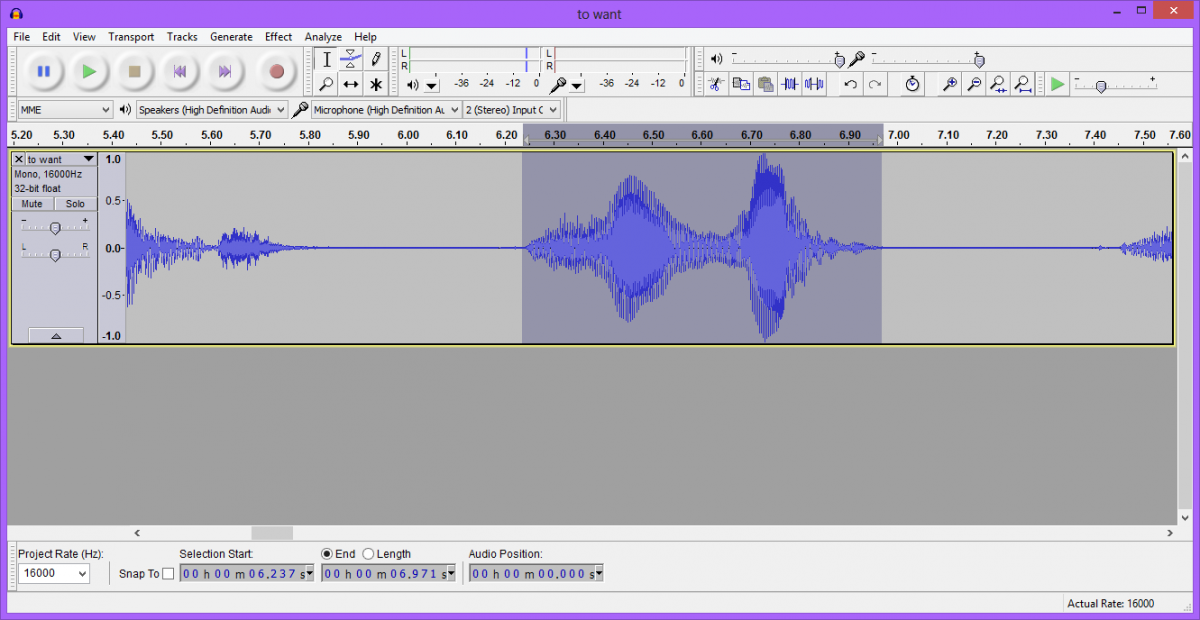
5. Check that it looks like the amplification has been done OK
If you have done things correctly, you should see that the recording now touches either the top or bottom (or both) of the vertical range.
6. Correctly handling volume on long recordings or dialogues
Note that even if a full dialogue has been increased in volume, when chopped up into smaller parts, the individual parts then need increasing in volume again if they are not themselves normalised for volume. When they are chopped up even smaller, these smaller parts may need increasing in volume yet again.
Note that you don't raise the volume of any particular part of a long recording. It is a single recording, and so it should sound normal, including, sections spoken very quietly, if that is how they were spoken. But, when you break the long recording into smaller sections, then, and only then, should the individual parts have the volume made higher.
Example: "A B C" might have max volume 0.5 which we double in volume to 1.0 in Audacity. However, maybe the original volume was "0.4 0.5 0.3", and so "A" had a max volume of 0.4 which gets doubled to 0.8 so the dialogue now has volume "0.8 1.0 0.6". This is OK in the "A B C" recording, but once it becomes just "A" (without the "B C") then it needs increasing again from 0.8 to 1.0. Similarly, the "C" of the original recording will have a volume of 0.6 after the original volume increase. This is OK when "C" is part of "A B C", but if "C" becomes a section on its own, then the volume needs to be increased from 0.6 to 1.0. It is not enough simply to break the larger recording up and export the segment without re-normalising the volume; each segment itself, when exported, has to have the volume normalised.
Where a dialogue has clear pauses between each sentence, e.g. FSI dialogues such as http://lingopolo.com/thai/word/did-the-traders-go-dialogue then the easiest is usually to normalise the volume first on each sentence rather than simply once on the whole dialogue. This way the dialogue will have the same volume as the individual sentences.
Example: let us consider again the "A B C" dialogue with original volume levels "0.4 0.5 0.3". If the section A, B and C have enough pause between them, we can maximise one by one the parts to have "A B C" with volume "1.0 1.0 1.0". Now the dialogue will have the volume correctly normalised, but also the individual parts will also have the volume correctly normalised.
Which is better, taking "0.4 0.5 0.3" and making it "0.8 1.0 0.6" and then "1.0" for each part, or "1.0 1.0 1.0"? Usually it is easier to systematically increase the volume of the individual parts to create a "1.0 1.0 1.0" volume for the whole and "1.0" for each of the parts. For very clear FSI dialogues for example this is usually the best. Sometimes though, when there are no pauses in the longer dialgoue, it is not possible. Also, it may not sound correct. Thus for the complete dialogue to sound correct, it may not be desirable to make the volume the same for each phrase within it.
The summary though is this: whatever the length or origin of the recording, it should be normalised for volume.